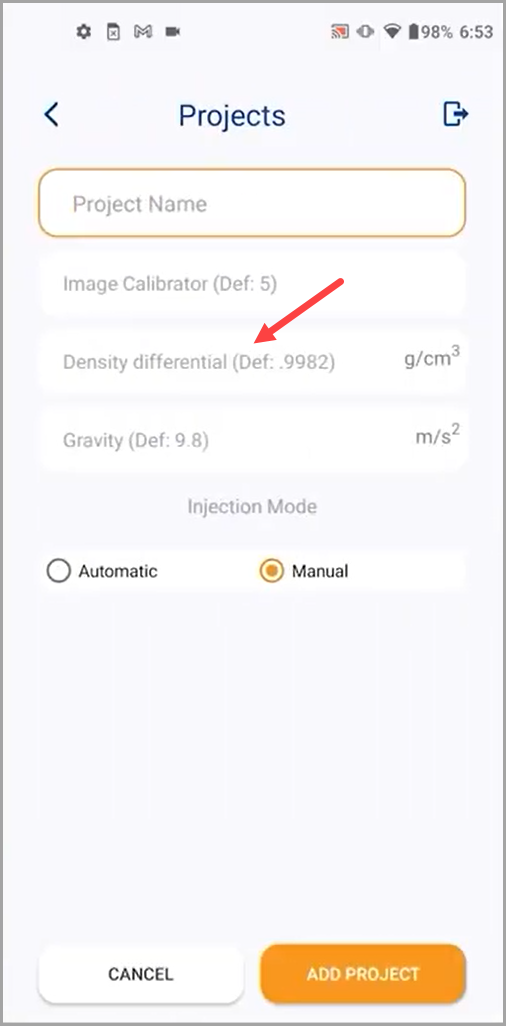
- The contact angle measurement starts off with project creation as explained in the How to Create a New ProjectArtikel.
- While creating the project, make sure that you leave the density differential to its default value since the experiment does not include liquid and liquid.
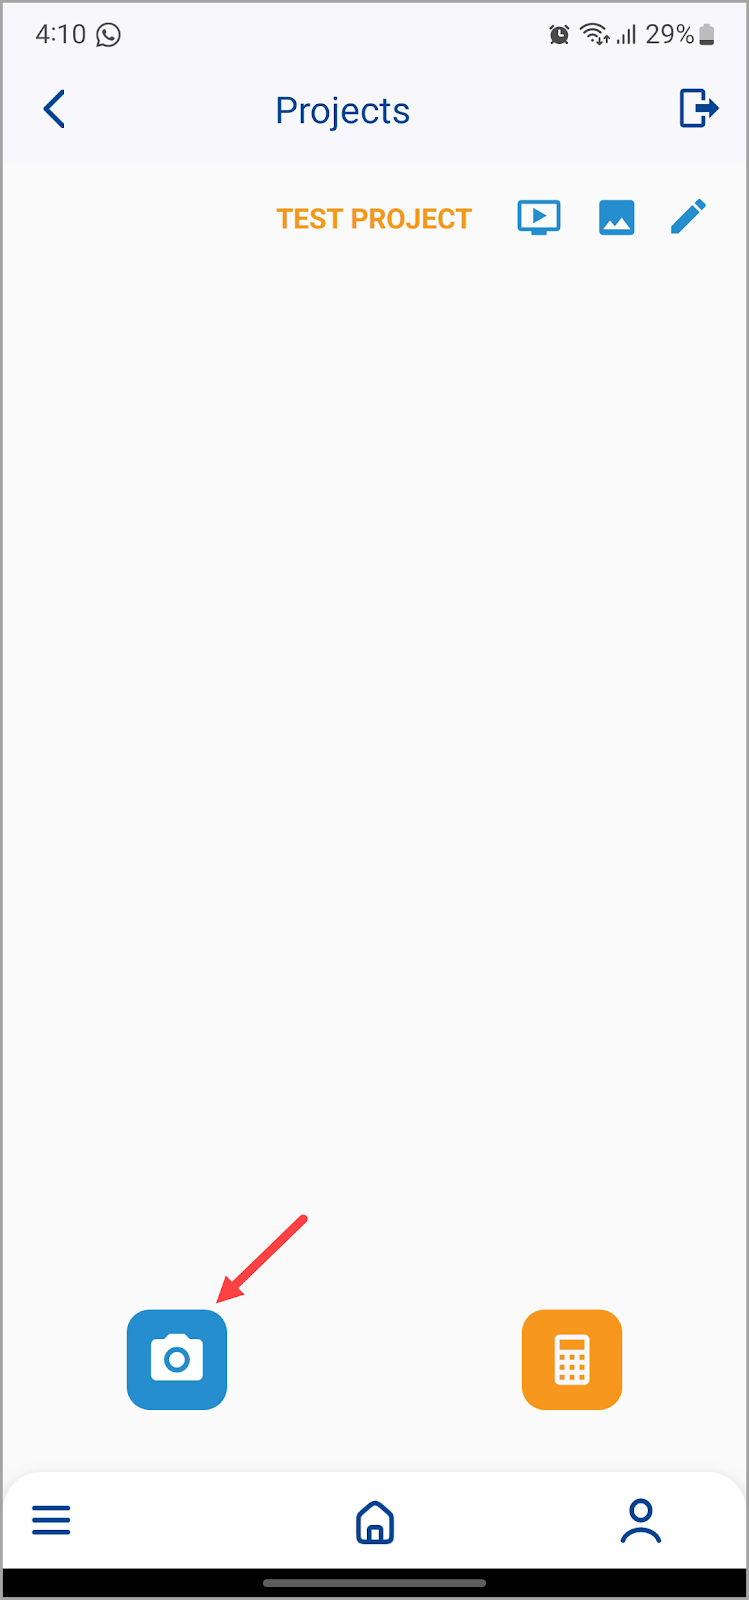
- Once the project is created, tap the project tile to open the selected project.
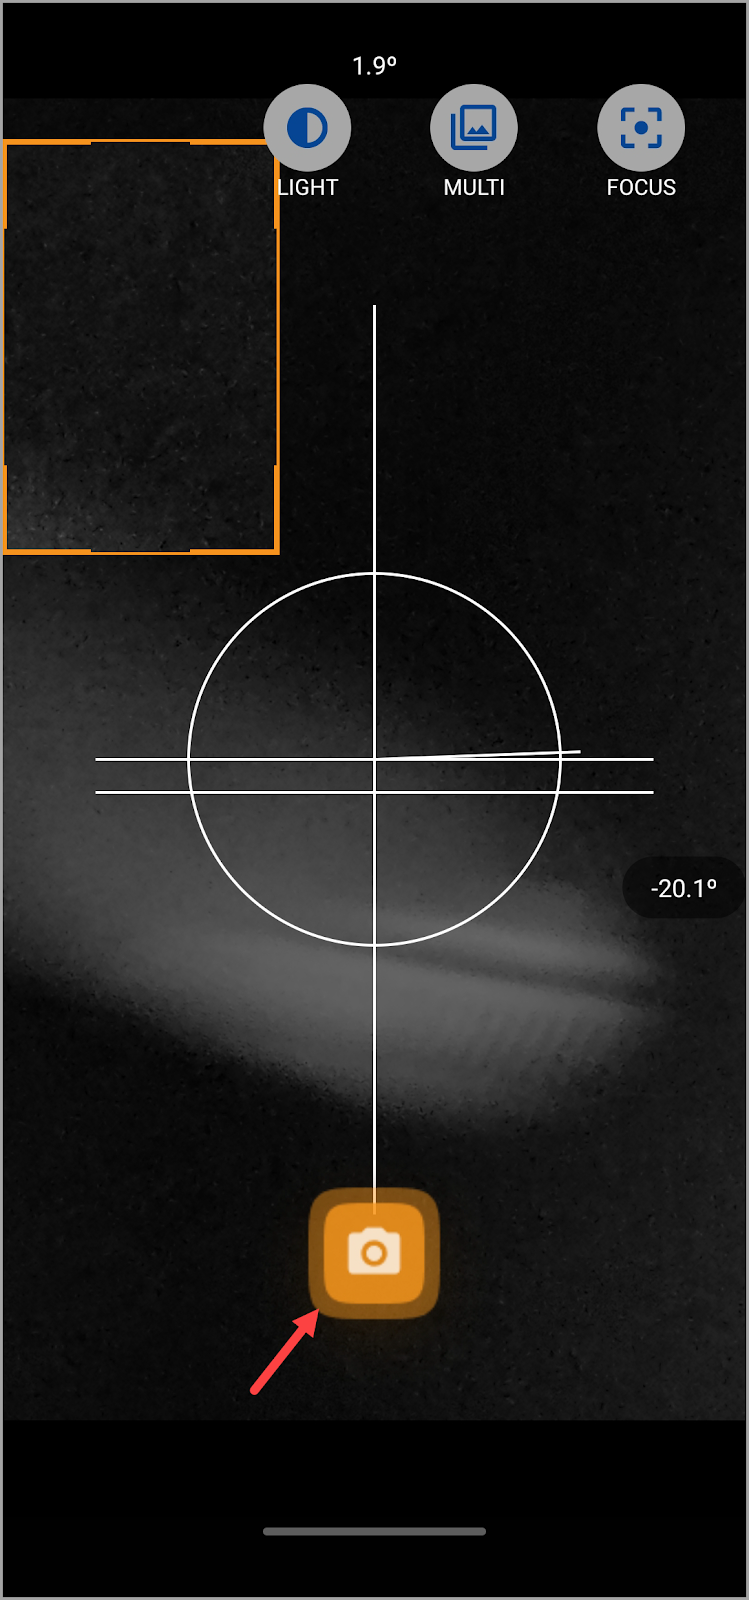
- Tippen Sie auf dem folgenden Bildschirm auf die Schaltfläche Bild aufnehmen in der unteren linken Ecke.
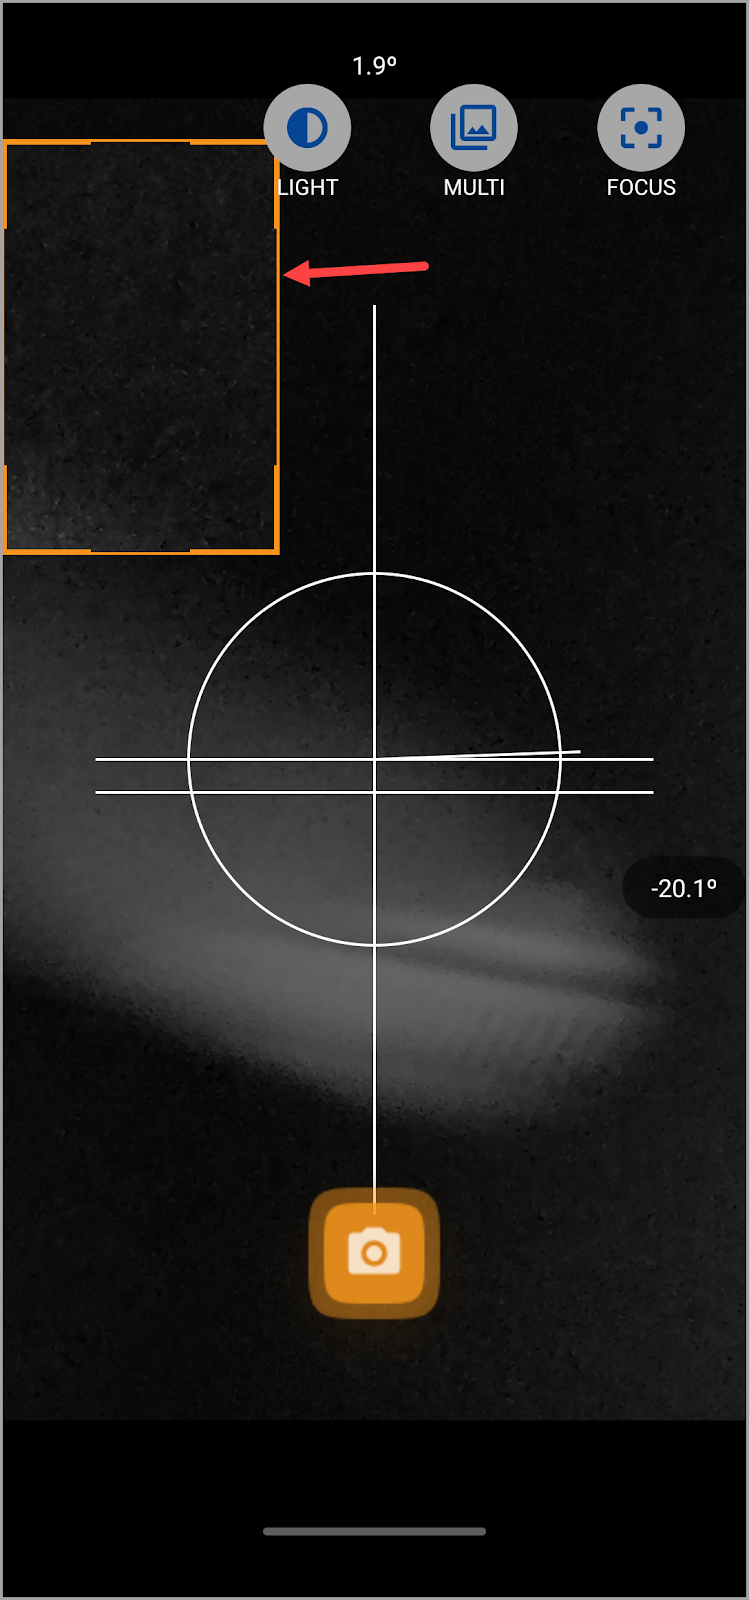
- Wenn sich die Kamera öffnet, stellen Sie den Abstand zur Nadel so ein, dass Sie den Fokus nicht verlieren.
- Ziehen Sie das orangefarbene Feld und passen Sie es an, um den Bereich auszuwählen, den Sie aufnehmen möchten.
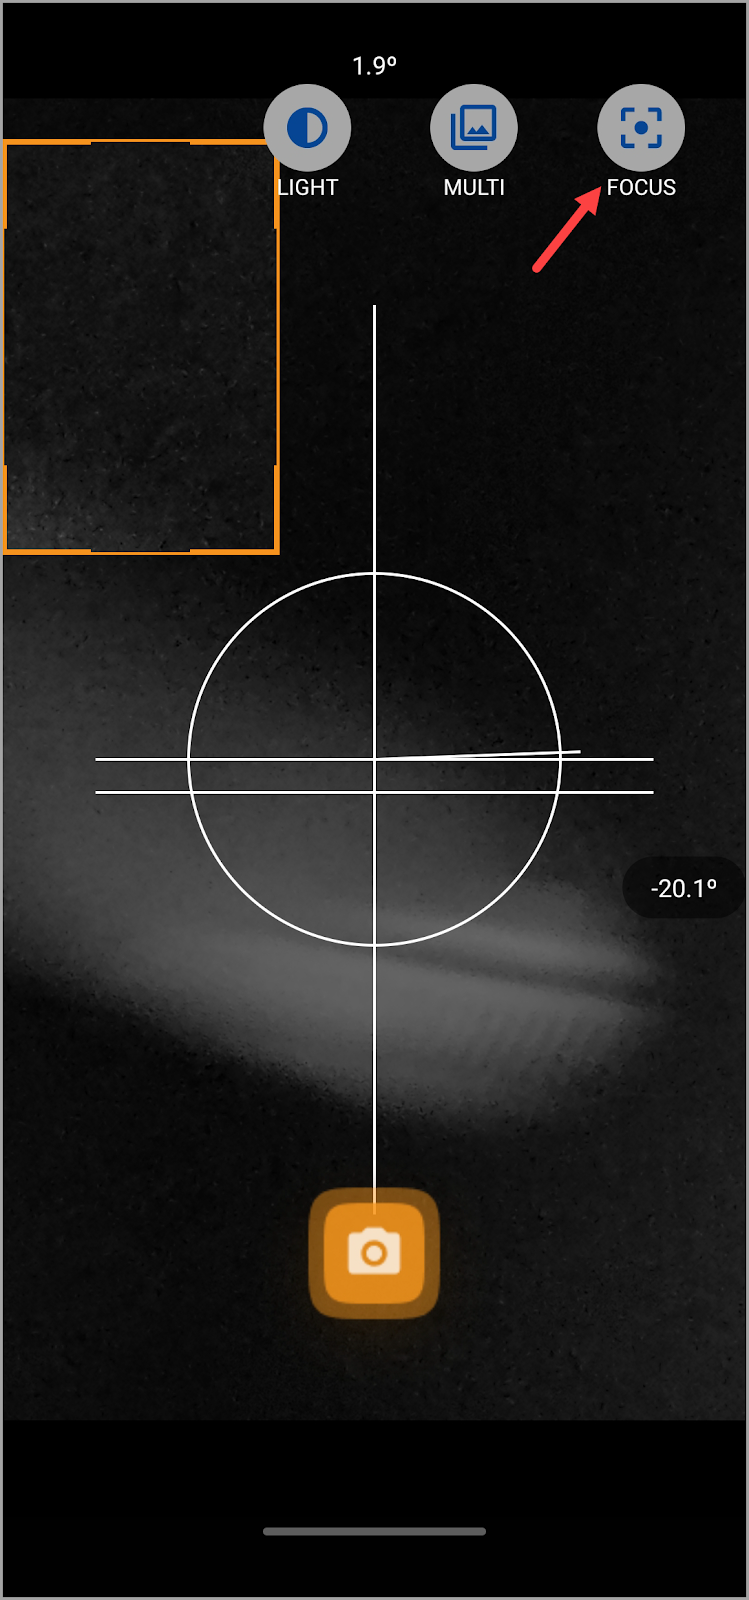
- To ease it out, tap the Focus button atop the screen so that you can adjust the focus slider in order to obtain the best results. You need to be as close to the droplet as possible without losing focus.
- Sobald Sie die erforderlichen Anpassungen vorgenommen haben, tippen Sie auf die Aufnahmeschaltfläche. Dadurch wird eine Vorschau des aufgenommenen Bildes mit den Details zum Kontaktwinkel angezeigt.
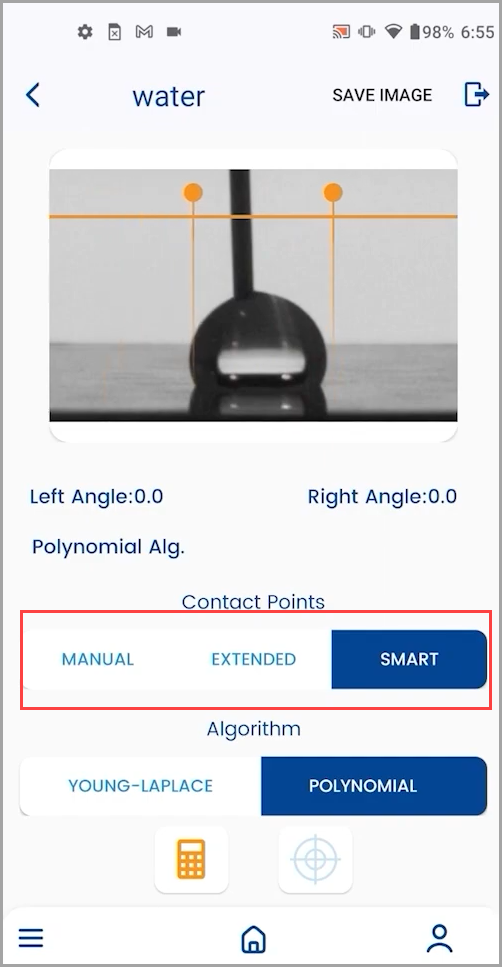
- Here, you can see the Contact Points heading with three options below it. They include Manual, Extended, and Smart. By default, the Smart contact points method is selected. This method only requires you to provide an estimate of the contact points at the baseline and right and left. The exact contact points are then auto-detected by the system.
- The default algorithm for calculation is the Polynomial algorithm.
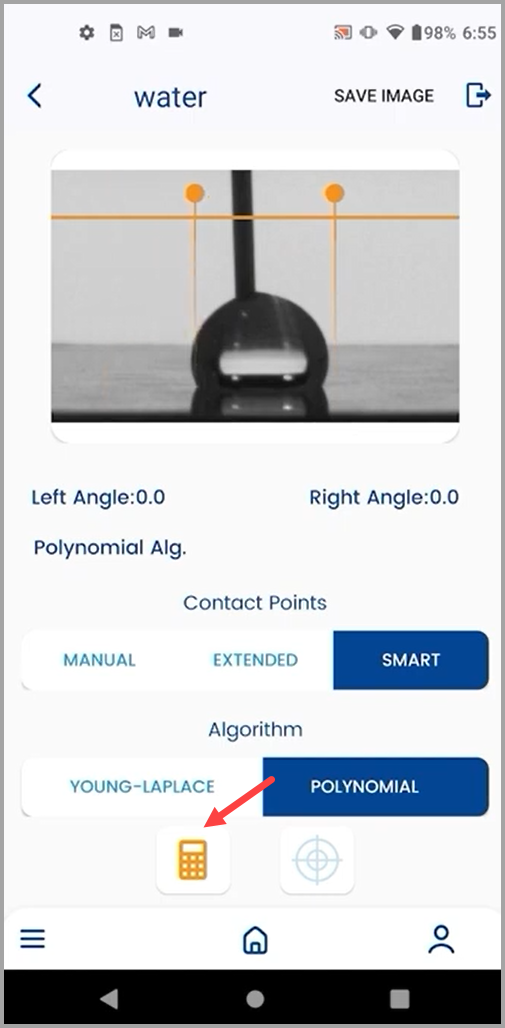
- Sobald die erforderlichen Anpassungen vorgenommen wurden, tippen Sie auf die Schaltfläche Berechnen.

Tipps und Tricks
For best results, place the phone as close to the droplet as possible while keeping the droplet in focus and the focus slider set to its maximum value.
Darüber hinaus können Sie den besten Kontrast zwischen dem Tröpfchen und dem Hintergrund erzielen, indem Sie das LED-Licht auf der Grundplatte anpassen.
To better configure the image settings, capture a test droplet.
Here, a useful tip to keep in mind is not mistaking the reflection of the droplet for the original droplet while capturing the baseline.

Die Young-Laplace-Methode wurde bereits ausführlich in der So kalibrieren Sie das Gerät ? Artikel.